Reading time: 14 minutes
This post may contain affiliate links. If you click these links and purchase something we may earn a commission. This helps us provide the information here free of charge to you. Continue Reading.
Are you interested in making money online or starting a blog? If yes, then you’re in the perfect place. Blogging is one of the best ways to earn online.
A massive number of people have changed their lives through blogging. Blogging is an ideal way to earn a living online.
Furthermore, blogging is relatively easy and requires little effort. Even you are eligible to become a successful blogger someday. With that said, you might want to establish your blog as soon as possible.
The basic requirements for launching your dream blog include having a domain, hosting, and content posting software to brace your internet content.
There are no doubt millions of options out there; nevertheless, Bluehost – a hosting service, and WordPress.org – a free open source content management system, are two highly recommended services that you should rely on to start a blog.
Hence, let’s not waste any time and dive straight into the art of blogging through Bluehost and WordPress.
Web Hosting Service
First and Foremost, you will need hosting to start a blog. Web Hosts are companies that allow you to buy their services.
These services are used to host websites on the internet, where you may present your blog.
Once the Web Hosting company starts hosting your website, users can easily access your blog using your web address or domain name.
There are a total of approximately 330,000 Web Hosting companies out there.
Honestly, that’s a tremendous number, and with all these several companies, it can be very difficult to look for the best.
Beginners would usually be looking to establish their blog without spending a single penny. However, I can not stress this enough.
Never go for a free blogging platform because these websites won’t allow you to earn from your blog. Most of these free blogging platforms don’t allow display advertising or affiliates.
These are two of the major requirements to make money through blogging.
Even if you do not want to spend huge sums on web hosting, you can easily find companies that offer services at low and affordable prices.
My personal preference for web hosting is Bluehost. It qualifies in the top 10 web hosting services across the world.
Bluehost allows you to reach absolute perfection in just a few dollars. Bluehost is pretty easy to use with a quite friendly user interface.
With that said, I wouldn’t be exaggerating if I told you that Bluehost is the best available option for beginners.
It only takes up to 15–30 minutes to see BAS5 t up your blogging website through Bluehost. With just $3.95 per month, Bluehost can offer a lot.
You don’t need several years of experience, nor do you need a strong portfolio or a prominent financial background to set up your blog.
By properly following a few steps, you’re qualified to shine in the world of blogging.
Why Should I Choose Bluehost to Start a Blog?
While looking for a web host, you must know that the cheapest isn’t always the best option. You want a cost-effective hosting provider.
This is where Bluehost kicks in. Bluehost provides many excellent features apart from simply hosting your website.
A Bluehost package comes inclusive of a free domain name for one year, free site builder, a one-click WordPress installation if you will be using WordPress, 1,000+ free templates and themes to choose from, and Bing and Google Adwords credits.
What else can one desire from such a web hosting company?
In case you’re still not convinced, here are a few of the many benefits of using Bluehost for your blog
- Bluehost hosting is cost-efficient.
- It is user-friendly.
- Bluehost provides fast page loading speed.
- Bluehost has a 99.9% uptime.
By now, you must’ve realized that Bluehost is the best web hosting option for you. Therefore, let’s understand how to start a WordPress blog with Bluehost.
To Start a Blog go With WordPress And Bluehost
Here, I have compiled a few basic steps that you need to follow to establish your desired blogging website.
Step 1: Decide Your Blog Name And Blog Niche
While establishing your personalized blog, it’s essential to acquire an engaging name for the blog. Take up to an hour and come up with the perfect name that represents your blog.
You need this name to be appealing to the viewers for it to attract traffic to your blog.
Moreover, you also need to take some time and decide what niche you’ll be blogging about.
Try to base your blog on something which you believe would attract customers.
Do your research and find out what niches are viewers most interested in.
To make it easy for you, here I have compiled a few of the top niches ideas.
- How to Make Money
- Personal Finance
- Health And Fitness
- Food
- Beauty And Fashion
- Lifestyle
- Personal Development
- Travel
Feel free to select any of the mentioned niches. However, I’d encourage you to do further research before reaching a final decision.
Even though it’s highly recommended to select a blog name that reflects your niche, you can still choose any name and brand it out over time.
Hence, if you’re certain about your blog name and blog niche, get ready to set up your website.
Step 2: Select A Bluehost Hosting Plan
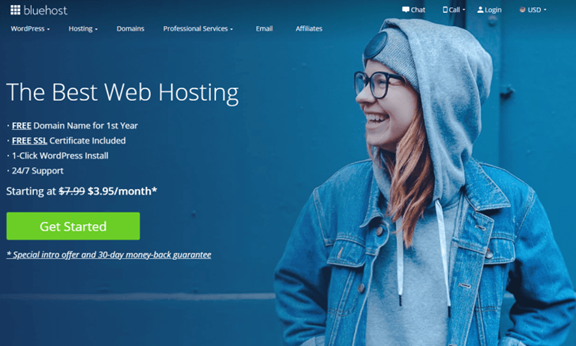
Next, you need to go directly to the Bluehost homepage. Once you’re there, follow the steps mentioned below, and your blogging website will be set to go in no time.
Select the Get Started option from the Bluehost homepage.
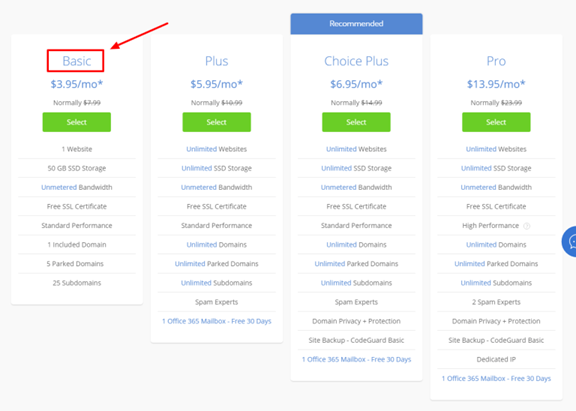
You will then be taken to the pricing cards. Here, you’ll be able to view all the pricing plans that Bluehost has to offer.
Currently, Bluehost offers four main pricing plans for WordPress users. These are Basic, Plus, Gold Plus, and Pro.
These plans provide distinct features, and the higher you go with the pricing plans, the more advanced features you’ll be receiving.
As an individual who’s just starting, I’d recommend you go with either “Basic” or “Plus.”
Basic: Bluehost’s “Basic” pricing plan has a lot to offer at an affordable price of only $3.95/mo. This plan provides hosts with one website.
It has a maximum storage limit of 50 GB SSD.
It provides Unmetered Bandwidth. You’ll be receiving standard performance with this plan, and you’ll receive a free SSL Certificate.
If we consider domains, the basic plan contains 1 included domain, 5 parked domains, and 25 subdomains.
If you don’t understand most terms used here, don’t worry. All you need to know as these features are more than enough for beginner bloggers.
Plus: Bluehost’s “Plus” at $5.95/mo comes with a few advancements to the Basic plan.
Unlike Basic, Plus allows you to host unlimited websites, and it also comes with unlimited SSD storage. This plan also offers unlimited domains, parked domains, and subdomains.
I’d personally recommend you to go with the Basic plan.
As a beginner blogger, it is the cheapest way to begin your blog. Once you’ve decided on your pricing plan, click Select to choose it.
Step 3: Determine Your Domain Name
After you’ve selected your pricing plan, you’ll be directed to the following page.
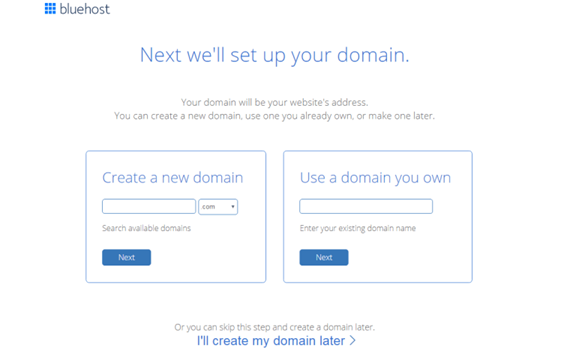
It is now time for you to choose a domain name. While setting up a website, the domain name is what matters the most. Thus, you need to take your time for this step.
Take half an hour and come up with the perfect domain name. This name will also be the web address for your website.
This is where you have an opportunity to get creative.
You can go with something as simple as your name for the domain. One can even use this domain name to reflect your niche.
You can come up with something like “makeeasymoney.com.” This is entirely your choice. Do whatever you desire with the domain name.
Once you’ve come up with the excellent name, type it in the left box where it states, “Create a new domain.”
You also need to make sure this domain isn’t already being used by someone else. Type in the desired name and select Next.
If the domain is already in use, you’ll get a message claiming another user owns the name. In this case, you need to come up with a different domain name.
After selecting a valid domain name, you will be taken to the “Create your account” page.
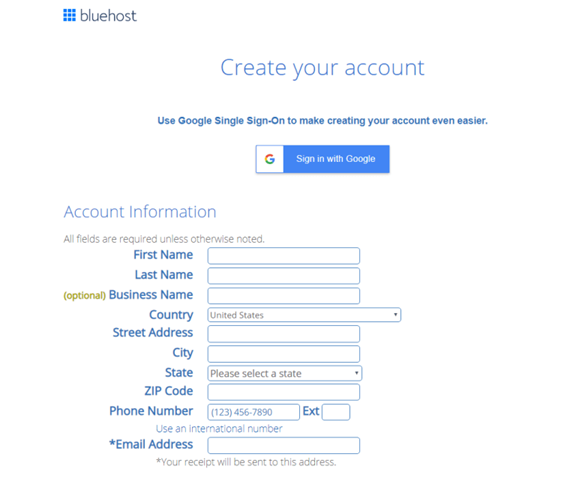
Here, you’ll be asked to fill in your personal information. It’s necessary to enter valid details, and only then will you be able to go further.
Afterward, scroll down until you see the Package Information column.
You’ll be asked for your account plan. This is the time for which you’ll be availing of the hosting services.
I’d personally recommend you to go with the 36-month plan as it provides the best value. However, if you’re looking for a small one year plan, the 12-month plan is great.
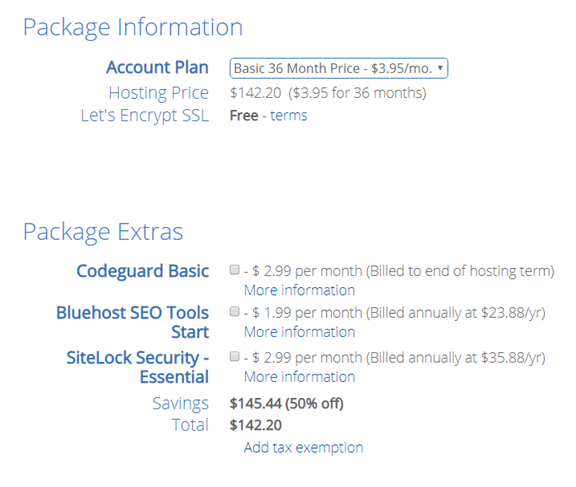
You can also add extra features t your plan.
However, as a beginner, you won’t need any such features, but they will surely improve your blog position.
I’d personally recommend you to leave these extras unchecked similar to what’s shown in the image.
Bluehost also offers you to refund for the plan within the first 30 days of purchase. Bluehost offers a guarantee and will provide a full refund in case of change of mind.
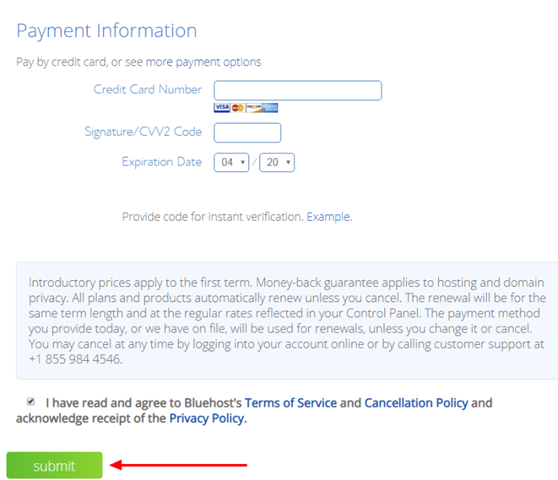
The last step for finalizing your website is entering the billing details.
Correctly enter your Credit Card number, CVV2 code, and Expiration date.
Double-check this information to make sure it’s accurate. Finally, check the privacy policy and the terms of service and click the Submit button.
Congratulations, you now officially own a blogging website. It’s now time to customize your website and make it much more appealing.
Step 4: Start Your WordPress Blog
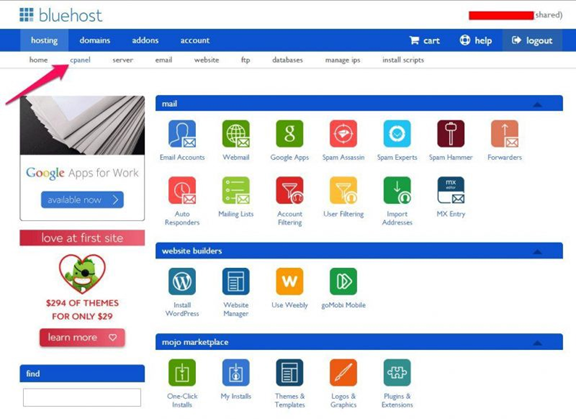
Now that you have established your website, you need to start working on the blog itself. You need to sign in to the Cpanel of your website using your email and password.
After signing in, you’ll receive a message that’ll allow Bluehost to introduce the WordPress site. However, using Bluehost for this purpose has a cost.
Moreover, it’s pretty easy to do the whole procedure yourself for free.
Follow the instructions below if you wish to introduce WordPress to your Bluehost site.
1. First of all, you need to locate the blue Install WordPress option in your Cpanel. This is the single tick installer, and as soon as you select this option, BlueHost will start installing WordPress on your site.
2. Make sure to set both a convoluted Admin Username and Password. That’ll make your blog much more secure. Make sure that you note this username and password somewhere so that you won’t forget it afterward.
3. Finally, select the Install button, and your blog will be ready in no time.
4. Soon you’ll receive the address of your site, which you can use to sign in to your site. On this address, you need to enter your username and password, and after that, you are all set to compose blog posts for your website.
5. Now that you’ve set up your blog, you must customize it and make it more appealing. You can now move to the last and final step, which is based on the customization of your blog.
Step 5: Customize Your Blog
The final step in making a professional WordPress blog with Bluehost is to personalize your blog. As a blogger, it must be crucial for you to ensure traffic on your blog.
To achieve that, you must make sure your blog is alluring and attractive. I’ve collected a few of the fastest ways by which you can significantly raise the standards of your blog.
If you want to capture the viewer’s interest with your blog, be sure to follow along with me.
1. You need to choose a theme for your blog. The blog theme directly affects how your blog looks and whether viewers are attracted to it or not.
To view the best themes, you need to sign in to your WordPress site. Select Appearance and then click on Add New. You will now be presented with hundreds of themes to choose from.
Go through the most appealing themes and do some research before finalizing them. Take some time and pick the theme that you feel would be perfect for your site.
However, you don’t need to stress yourself too much over this as you can go back and select a different theme anytime.
Bluchic helps in creating feminine WordPress Themes for female bloggers and entrepreneurs so that a female can build a beautiful and professional website with elegant design.
2. You would need to install a few extra plugins that will enhance your blog. Plugins are little add-ons that you may add to your blog. Most plugins you’ll find here are free of cost.
To install plugins, you need to snap Plugins in the left segment of your site. Afterward, you need to select the Add New option.
Do a little research and find out what different plugins do. Install the ones that seem most appealing to you.
3. I’d recommend you to add a logo to personalize your blog further.
You can use photoshop for creating this logo. If that doesn’t work for you, you can hire someone to make a logo for you.
Either way, you will need a personalized logo for your site if you wish to appeal to visitors.
4. Focus on your niche. You need to customize your blog while keeping the niche in your mind. Add pictures related to your interests.
If you’re blogging about sports, use a background cover that supports this niche. Similarly, if you blog about food, you can add photos of restaurants or food itself to your site.
Step 6: Compose Your First Post
All that’s now left to do is utilize this blog for what it was built for. You are free to start posting on this blog.
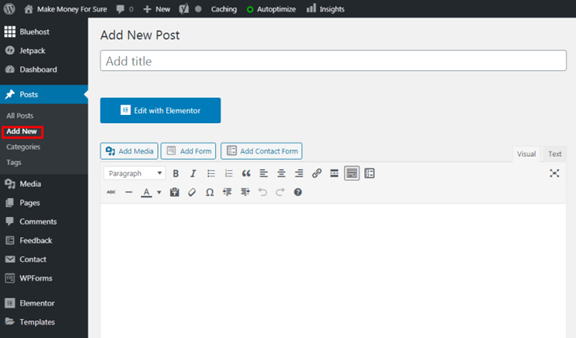
To publish your first ever blog post, you need to go to the Add New option under Posts.
You can do a lot with your post. Add photos by selecting the Add Media option. You will be offered numerous fonts and writing styles.
Once you’re done writing your first blog post, you are free to publish it.
You will see a Publish button on the top right corner of the page. Snap this button, and your post is available for others to view.
Make sure you correctly followed all the steps. If yes, then now you probably know everything about blogging through WordPress with Bluehost.
Congratulations, now you officially qualify as a professional blogger.
Final Thoughts
What are your thoughts on blogging? Well, if you ask me, blogging is really easy as compared to other methods of making online money.
It doesn’t require you to stress yourself out with hectic routines. You can blog whenever you want and wherever you want.
If you have excellent English skills, you can shine in the world of blogging.
It’s as simple as that. Moreover, blogging through WordPress with Bluehost is pretty simple as you read for yourself.
To start a blog, this whole procedure takes roughly 30 minutes to complete. With just a few spare dollars, you can now easily become a blogger.
I hope you enjoyed this article. In case of any queries, feel free to ask in the comment section below.


